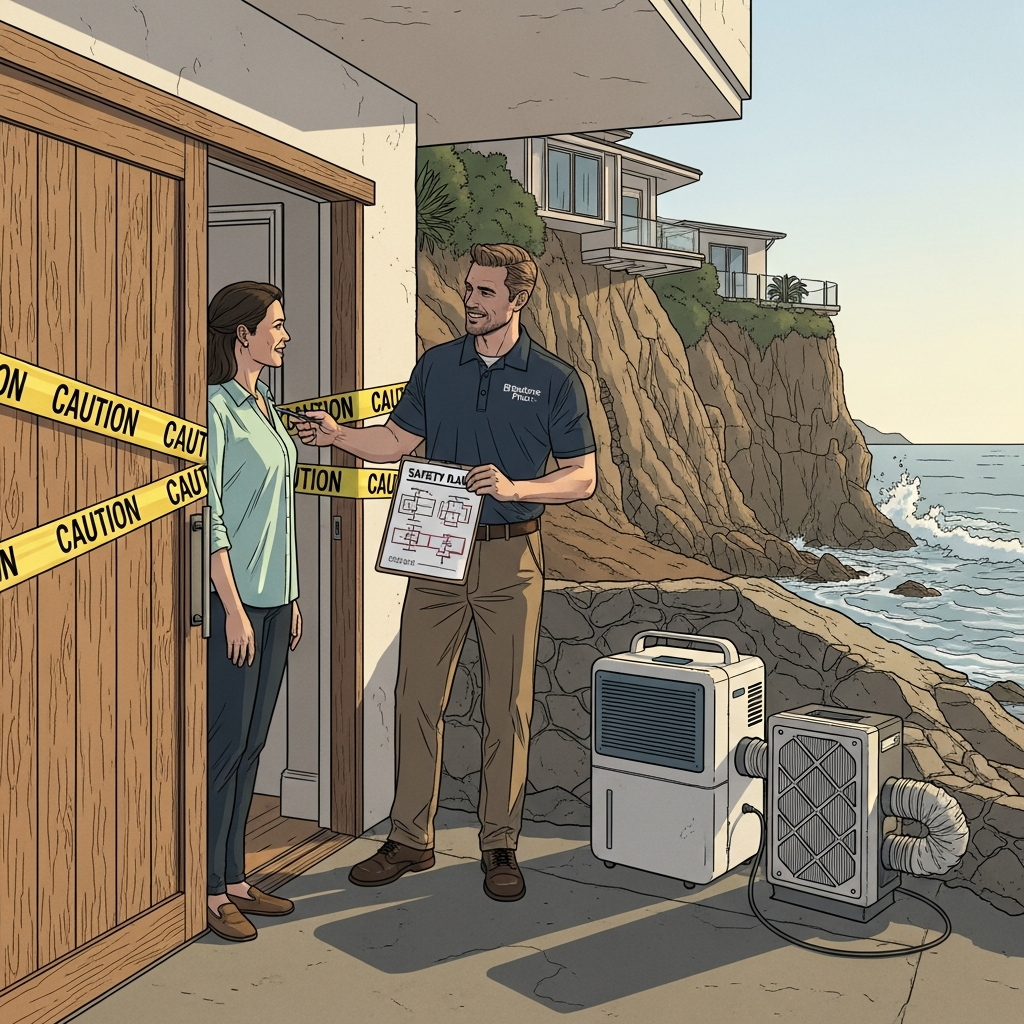
In Malibu, water damage is rarely just a single event. A storm rolls through, a line breaks, or a roof detail fails, and then the secondary story begins—a story told in humidity levels, hidden cavities, and the microscopic spores that settle wherever moisture lingers. Mold remediation is not about panic; it’s about timing, precision, and respect for how buildings breathe. Over the years, I’ve helped homeowners move from that first uneasy sight of speckled growth to a clean, dry, and healthy living space, and the throughline is always the same: align moisture control with methodical remediation, supported by qualified water damage restoration.
Here on the coast, our climate can be wonderfully forgiving and quietly enabling at the same time. Marine layers keep mornings cool and damp, Santa Anas wring the air dry, and homes straddle these swings with a mix of materials. If water sits longer than it should, the stage is set for mold. The good news is that with deliberate steps—inspection, containment, removal, cleaning, and verification—you can resolve the problem thoroughly and keep it from recurring.
Understanding Mold’s Timeline
After a water intrusion, spores need moisture, a food source, and time. Many building materials offer the food: paper-faced drywall, dust, wood products, and fabrics. Given a day or two of elevated moisture, colonies can start to form. That doesn’t mean every wet spot becomes a major remediation, but it does mean that delays complicate what could have been straightforward. Early action remains the best tool—not just chemicals sprayed on a surface, but moisture control that removes the conditions mold needs to thrive.
Assessment: Seeing the Unseen
A thorough assessment looks beyond what you can photograph. Moisture mapping reveals where water moved and where it’s still present. In Malibu’s varied architecture—plaster surfaces, open-beam ceilings, deep base details—water has many paths. We use non-invasive meters and, when warranted, small exploratory openings to peer into suspect cavities. If growth is visible, we document its extent and probable cause. Where health concerns exist or where the scope is complex, collaboration with an indoor environmental professional helps define the protocol and sets clear endpoints for success.
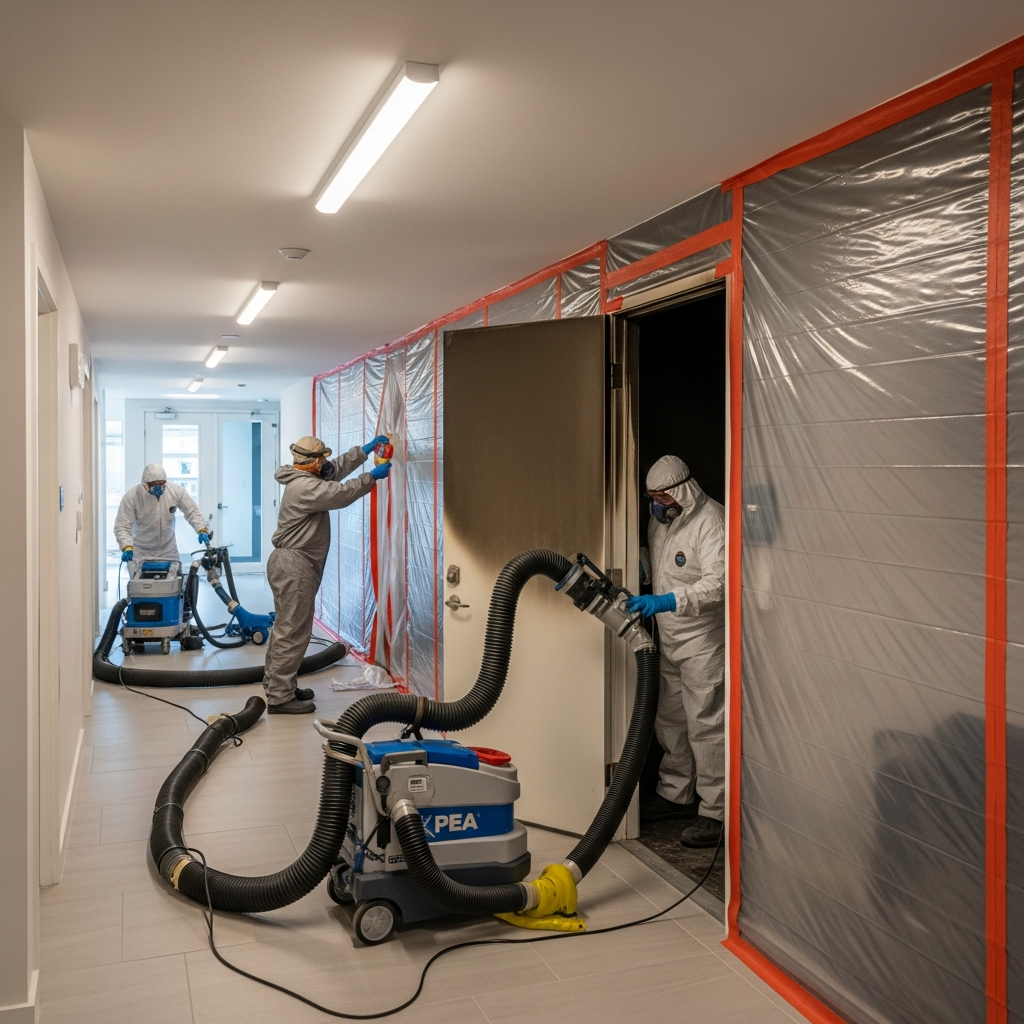
Containment: Keeping Clean Areas Clean
Containment is the quiet hero of remediation. It’s the simple idea that work in one area shouldn’t make another area worse. Plastic barriers, zipper doors, and negative air pressure directed through HEPA filtration keep spores from migrating as materials are disturbed. Air scrubbers polish the air in the work zone, and pressure monitors confirm that containment holds. This discipline protects your living areas and, just as importantly, gives crews the confidence to work efficiently inside the contained space.
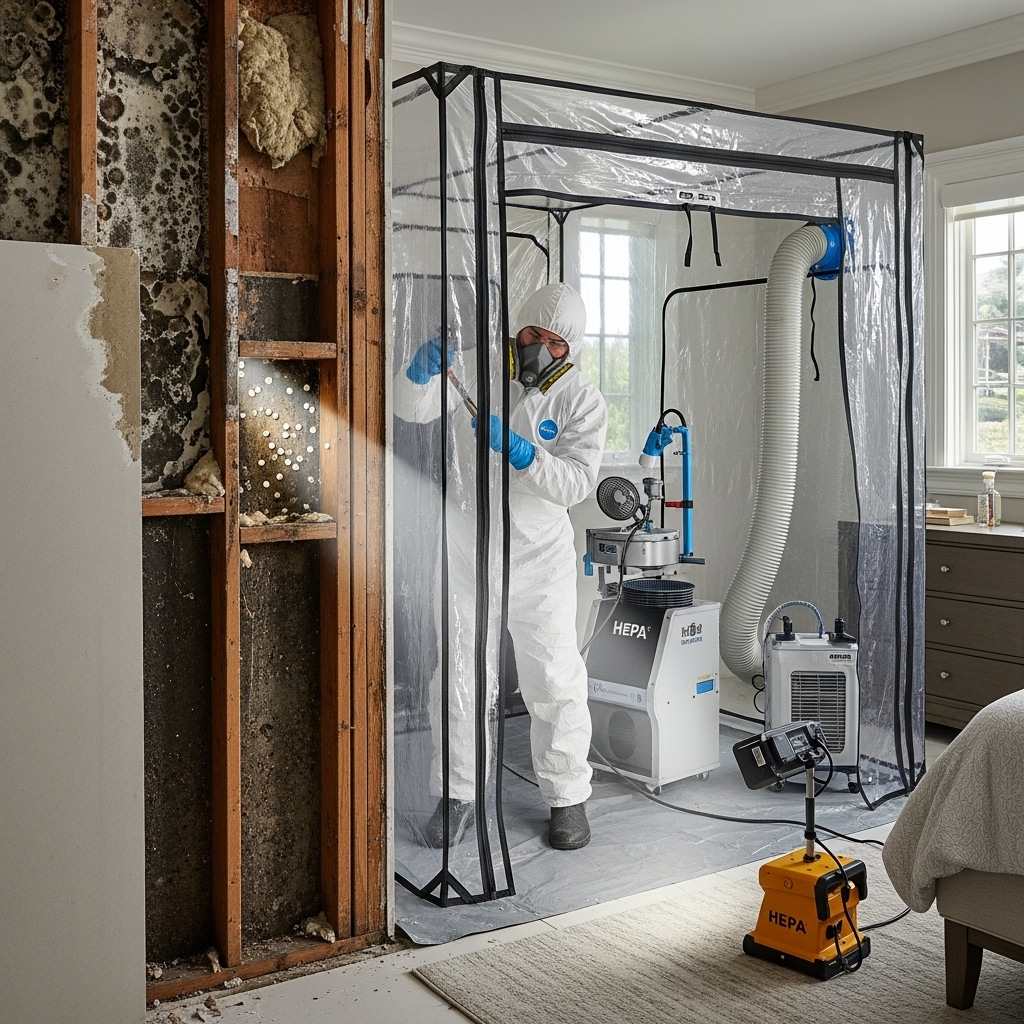
Selective Removal and Why It Matters
Different materials call for different decisions. Paper-faced drywall with visible growth is typically removed because the food source is integral to the material. Insulation behind it, if wet or supporting growth, goes as well. Solid wood with surface growth is often cleanable; so are many hard finishes. The goal is to remove what cannot be effectively cleaned and to preserve what can be restored without compromising long-term health. In plaster assemblies, we may be able to clean and dry if the intrusion was brief and contained, because plaster lacks the paper face that feeds mold readily. Each decision balances exposure time, moisture content, and the building’s design.
Cleaning, HEPA Vacuuming, and Detail Work
Once unsalvageable materials are out, the detail work begins. HEPA vacuuming removes settled spores and dust, and damp wiping with appropriate cleaners addresses residues on non-porous surfaces. We avoid harsh methods that can aerosolize particles unnecessarily; instead, the workflow proceeds from top to bottom, clean to cleaner, with attention to lip details, fasteners, and the undersides of sills. If framing is stained, gentle abrasion or media cleaning may be used to remove surface growth without damaging the wood. The last step is often a second HEPA pass after surfaces are dry, leaving the space ready for clearance assessment where that is part of the protocol.
Drying: The Partner to Remediation
No remediation succeeds without moisture control. Dehumidifiers and directed airflow reduce humidity and drive moisture out of materials. We set drying goals based on baseline readings from unaffected areas, not guesses. In Malibu’s coastal climate, we sometimes favor desiccant dehumidification in cooler, damp conditions and refrigerant units when warmer air will help. Air movers are angled to create smooth airflow, and we avoid blasting air directly at suspect surfaces unless covered and controlled, which could push spores elsewhere. Drying continues until readings confirm that materials are back in their normal range.
Special Considerations for Coastal Homes
Salt in the air changes how metals behave and how residues hold moisture. After storm-related water damage, neutralizing salt residues is part of the plan because salty surfaces can re-attract moisture, prolonging damp conditions. Oceanfront homes also contend with high ambient humidity during certain weather patterns; opening windows may feel fresh but can sabotage drying goals. Monitoring and HVAC coordination help maintain the right conditions. Onshore winds fill tracks and weep channels with fine sand and debris; cleaning those during remediation supports future resilience and prevents repeat issues.
Communication and Documentation
Clear communication turns an unsettling situation into a manageable project. A written plan outlines containment areas, removal scope, cleaning methods, and drying targets. Daily notes record moisture readings and progress. Photographs back up each step. If insurance or a third-party consultant is involved, this documentation streamlines approvals and keeps all parties aligned. For homeowners, it provides transparency and a sense of control in a process that can otherwise feel opaque.
Case Example: Post-Storm Wall Cavity Growth
A winter storm pushed rain horizontally into a stucco wall above a living room. A week later, a faint musty odor lingered, and a small patch of discoloration formed near the baseboard. Investigation revealed damp insulation and light surface growth on the back of drywall. Under containment, we removed a controlled section of wall, bagged and disposed of affected materials, and cleaned the cavity with HEPA vacuuming and damp wiping. Framing dried over several days under measured airflow and dehumidification. A final HEPA pass and verification readings cleared the space for repair. The homeowner kept most finishes intact because the response was surgical and timely.
When to Consider Testing
Not every project requires lab analysis. Visible growth with an obvious source and a clear remediation plan can proceed under established standards. Testing becomes valuable when occupants report health concerns, when growth is widespread or hidden, or when a third-party verification is desirable for peace of mind. In those cases, an independent professional defines sampling methods and pass/fail criteria, and post-remediation verification provides objective closure.
Protecting Contents During Remediation
Furniture, area rugs, and personal items near the work zone deserve attention. Cleanable items are HEPA vacuumed and wiped or moved to a clean staging area. Porous items that sustained prolonged exposure may be evaluated for specialized cleaning or replacement. Art and delicate objects benefit from conservator input, and staging them in a controlled environment prevents secondary contamination during the work.
Mid-Project Checkpoints
As materials dry and containment does its job, we pause to confirm that air changes are adequate, pressure is maintained, and moisture levels continue trending down. Equipment may be repositioned for better airflow into tricky corners or cavities. This is also a moment to address small but important details, like cleaning hidden surfaces under toe-kicks or within door tracks, ensuring that when containment comes down, the space is genuinely ready for rebuild.
Preventing Recurrence
Remediation without prevention is unfinished. Fixing the source—whether a flashing detail, a plumbing issue, or a drainage path—is the first line of defense. Beyond that, regular maintenance suited to Malibu’s coastal environment pays off: keep weep holes clear, maintain weatherstripping, tune gutter systems, and inspect vulnerable areas before the rainy season. Consider humidity control strategies where appropriate, such as bathroom ventilation verification and whole-home dehumidification in spaces that trend damp. Education matters too; knowing what early signs to watch for helps you act before a small issue grows.
Living Well After Remediation
When remediation wraps, the space should feel normal again—air that smells neutral, surfaces that are clean, and materials that test dry. Repairs can proceed with confidence. Many homeowners tell me that this phase brings a kind of relief that goes beyond the technical work. They understand their home better, they’ve tuned up systems and habits, and they feel equipped for the next rainy season. That is the quiet success of a well-run project.
Frequently Asked Questions
How fast does mold grow after water damage?
Given moisture and a food source, mold can begin to colonize within 24 to 48 hours. The speed depends on temperature, humidity, and materials. Early moisture control remains the best prevention.
Do I need to leave my home during remediation?
It depends on the scope and layout. Proper containment allows many projects to proceed while you remain at home, though some phases can be noisy. Sensitive individuals may choose to be away during demolition or cleaning.
Is bleach the best way to remove mold?
Bleach is not a cure-all and can be counterproductive on porous materials. Effective remediation focuses on removing affected materials where appropriate, thoroughly cleaning surfaces, and, most importantly, controlling moisture so growth cannot return.
What if mold is inside a wall I cannot see?
Moisture mapping and selective openings help confirm conditions. Under containment, we can access cavities, remove affected materials, and dry the structure. The process is surgical, designed to solve the problem without unnecessary demolition.
Will mold come back after remediation?
Not if the moisture problem is resolved and the area remains in a normal dry state. The combination of removal, cleaning, and verified drying addresses current growth and prevents recurrence.
Should I test the air after remediation?
Post-remediation verification by an independent professional can provide objective assurance when needed. Whether it’s recommended depends on project scope and homeowner preference. Many projects close successfully with visual inspection and documented dry readings alone.
Final Notes and Next Steps
Facing mold after a water event is unsettling, but you have a clear path forward. Align moisture control with careful containment and methodical cleaning, and lean on experienced professionals who know Malibu’s climate and construction. When you’re ready to restore your space and your peace of mind, reach out for trusted water damage restoration and remediation guidance. With prompt action, your home can return to the clean, calm environment it’s meant to be.