When a winter storm sweeps through Malibu, it rarely announces its full intent. The sky turns the color of steel, the wind funnels through canyons, and the Pacific grows restive. By the time the rain bands stack up and the surf pounds the shore, residents are already listening for the telltale sounds inside the house—drips in the ceiling, a pump kicking on in the crawlspace, runoff finding a new path across the patio. In those first uncertain hours after the rain eases, the path forward becomes the difference between a minor setback and months of disruption. As a local who has walked these properties in every season, I can tell you that timely, informed action anchored by professional water damage restoration is the backbone of a smooth recovery.
Malibu is a study in contrasts, and the way stormwater behaves here reflects that. We have oceanfront homes sitting practically in the spray and hillside estates tucked into chaparral, connected by winding roads that can be both scenic and treacherous after heavy rain. The same storm cell that sends sheets of water down PCH will be dropping silt from canyon slopes and pushing seawater over the berms onto decks and patios. Understanding how your particular property interacts with that storm is the first step in charting a restoration plan that doesn’t waste time or compound damage.
How Winter Storm Flooding Moves Through Malibu Homes
On the shoreline, winter swells and storm surge can coordinate with heavy precipitation to drive water under sliders, through weep holes, and into wall cavities. Wind-driven rain is notorious for bypassing otherwise sound seals, and when you add sand-laden water, it becomes a grinding paste that scours finishes and wedges its way into gaps. A mile inland, the physics change. Canyon runoffs build into muddy sheets that push against foundation vents and seep into subfloors, while drainage swales and French drains can become overwhelmed. Even well-designed homes can experience backflow through floor drains and low-lying entries if the rainfall aligns with a high tide that slows or reverses drainage.
Inside, water follows gravity, capillarity, and air pressure. It seeps sideways through butt joints in hardwood, wicks up drywall a foot or two, and threads through insulation to find cold surfaces where it condenses again. The materials here—plaster, old-growth timber, engineered flooring, stone veneers—each hold and release moisture differently. A good restoration plan respects those differences and sequences the work accordingly, so you’re not chasing moisture from room to room or trapping it behind an impermeable layer.
First Priorities in the Hours After the Storm
Safety sits at the top of the list. Before thinking about drying equipment or salvage, verify that power is safe to use, gas lines are intact, and there are no concealed hazards like a compromised ceiling panel or a saturated plaster soffit that could fail without warning. If you can, shut off affected breakers and photograph conditions while they are undisturbed. Those early images tell the story of the loss when you’re later explaining it to a claims adjuster or architect, and they help a restoration team plan for the right staging area, equipment, and containment.
Once the scene is safe, removing standing water quickly pays dividends. Water is never just water after a flood. In Malibu, it may carry fine silt off the slope, salt from blown spray, organic debris from canyons, and occasionally wastewater if drains were overwhelmed. The category of water determines whether materials can be cleaned and dried or should be discarded. Clean-water intrusions from a roof leak are one thing; stormwater that has mingled with soil and backflow is another. Proper extraction and sanitation, matched to the category, set you up to dry, decontaminate, and rebuild without lingering odors or microbial blooms.
The Science of Drying Coastal Homes
After extraction, drying is both art and science. In our coastal climate, we have days when the outdoor air is cool and saturated, and others when Santa Ana winds behave like a giant hairdryer. A skilled team measures ambient and material moisture, logs them, and then chooses the right blend of airflow, dehumidification, and heat to meet a drying goal. For example, dense plaster walls in older Malibu homes may require longer, gentler drying to prevent cracking, while newer drywall responds well to wall-cavity drying that moves air specifically where it is needed. Engineered hardwood might be coaxed back toward flatness if the intrusion is brief, but solid oak over a saturated subfloor likely needs panelized removal to access the moisture below.
Equipment placement matters. Air movers angled correctly create laminar flow across wet surfaces, not turbulent gusts that scatter spores or force moisture deeper. Dehumidifiers must be sized to the cubic footage and the load. In some cases, we employ desiccant dehumidifiers for cold, damp conditions when refrigerant units are less effective, especially in basements or lower levels carved into slopes. The aim is to control the environment so materials release moisture at a steady pace, without encouraging secondary damage like swelling cabinetry or corrosion of metal fasteners.
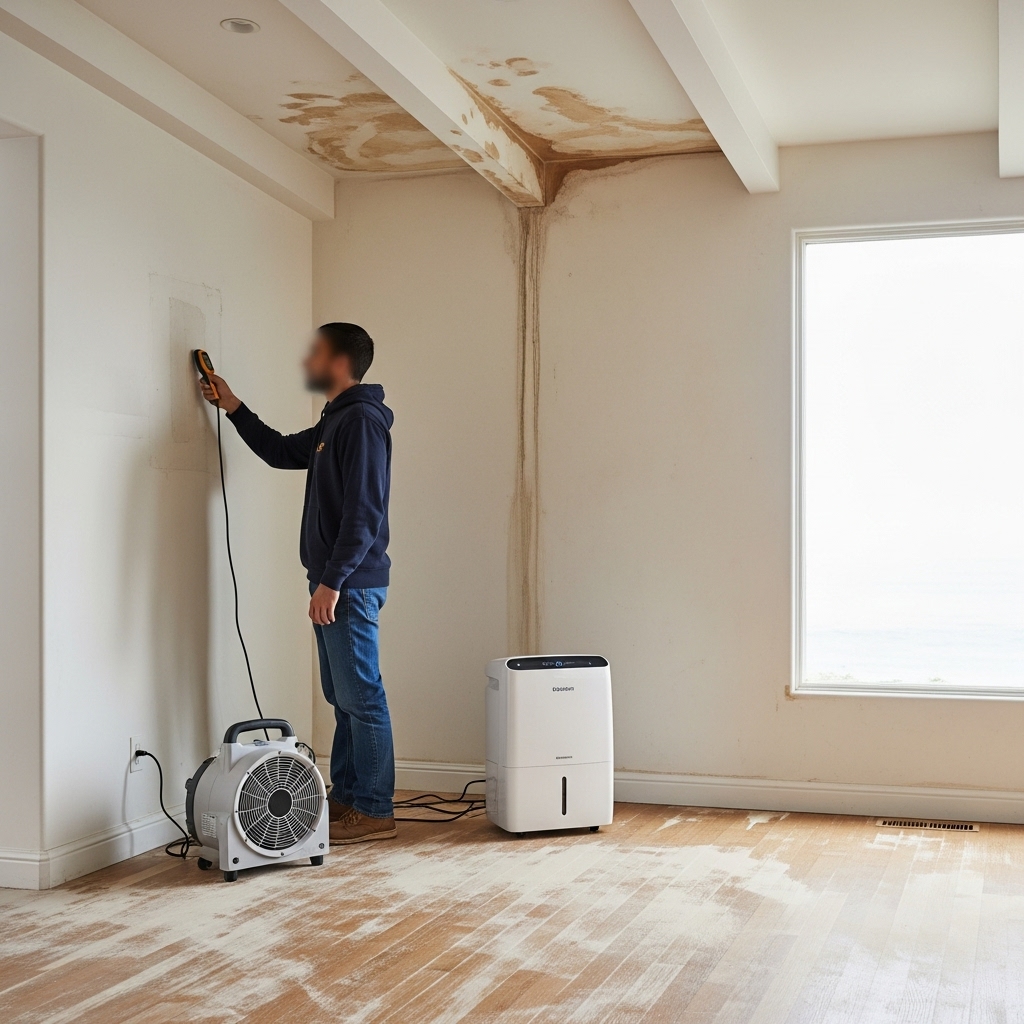
Hidden Pathways and Why Moisture Mapping Matters
Even seasoned residents can be surprised by where water travels. We routinely find moisture wicking behind stone cladding, tracking along furring channels, or collecting beneath floating floors far from the apparent source. Thermal imaging and pinless moisture meters highlight these pockets so we don’t leave behind a small reservoir ready to feed mold after the equipment leaves. In many Malibu homes, finished spaces adjoin conditioned crawlspaces, storage rooms under decks, or utility chases behind built-ins. Each of those voids adds a dimension to the drying plan. Opening a discreet access point and using directed airflow can save a finish material that would otherwise be written off.
Contents need the same thoughtful triage. Upholstered furniture saturated by stormwater rarely makes sense to keep, while solid wood can often be cleaned, sanitized, and slowly dried if the exposure time was short. Rugs with natural fibers may shrink if rushed; delicate art pieces require microclimate chambers and conservator input. The line between what is sentimental, what is practical, and what is safe is clearer when you have a roadmap that explains both the exposure and the cleaning protocol.
Salt, Silt, and Sanitation
Ocean-influenced water presents unique challenges. Salt is hygroscopic; it attracts moisture from the air and holds it, which can complicate drying and drive ongoing corrosion of fasteners, hinges, and electronics. Sand grits into hardware and mechanicals, and fine silt finds every gap. Post-storm sanitation includes thorough rinsing of affected surfaces, not just disinfecting. You want to remove residues that would otherwise skew moisture readings, foster odors, or accelerate corrosion. Stainless steel isn’t immune; in the presence of chlorides, even high-grade stainless can pit if not cleaned promptly. Cabinet toe-kicks, appliance bases, and the undersides of aluminum thresholds deserve careful attention.
Mold Prevention and the Restoration Timeline
In our climate, mold can become a factor within a couple of days if materials stay wet and warm. Prevention begins with moisture control, not just chemicals. Lowering the humidity below the threshold for mold to thrive, moving air across surfaces, and removing vapor barriers that trap wetness form the core of prevention. If colonization is already visible, targeted removal with proper containment keeps spores from migrating to clean areas. Clear communication about the timeline helps set expectations: extraction and sanitation in the first day, aggressive structural drying over several days to a week or more depending on the materials, and then repairs only after drying goals are confirmed with readings. Rushing to close up walls or lay new floors before the structure is truly dry is the most common mistake we see following storms.
A Malibu Case Study: From Storm Surge to Stable Home
One winter, a powerful system synchronized high tide, storm surge, and a line of squalls that pummeled beachfront homes. At a property near La Costa, sliders were overwhelmed despite intact weatherstripping, and water flowed under the floor into a media room two rooms back from the ocean. The owners did the smartest possible thing: they shut off power to the affected circuits, took photographs, and called for help immediately. We arrived to find a mix of surge and rainwater, with a telltale sheen of fine sand across the entry. After extraction, we pulled the baseboards and discovered moisture wicking behind the modern plaster finish, with insulation damp up to 16 inches. We used wall-cavity drying with small vents and negative pressure to pull air through the cavities while maintaining containment to prevent any cross-contamination. A targeted rinse neutralized salt residue on metal track components. Within a week, moisture readings were back to baseline, and because we avoided unnecessary demolition, the repair phase was measured in days, not months.
Working With Insurance Without Losing Momentum
Documentation is your ally. Clear moisture maps, daily logs, and photographic progress notes demonstrate the necessity and effectiveness of each step. In the wake of a community-wide event, adjusters may be stretched thin, and having everything laid out shortens decision cycles. It also provides transparency that reassures you, the homeowner, about what is happening behind the scenes. Coordination with your architectural team or builder keeps the handoff from mitigation to repairs smooth, and a good restoration partner will communicate in both directions so design decisions align with the real conditions on site.
Mid-Project Course Corrections and Communication
Every home has its quirks. Maybe the floor system reveals an unexpected vapor barrier, or a beautifully crafted built-in turns out to hide a supply chase. What you want is a team that checks results and adjusts, not one that sets equipment on day one and returns a week later to see how it went. Regular updates, including a mid-project assessment, ensure the drying strategy tracks toward goals. This is also a good moment to revisit salt and silt mitigation in coastal zones. A quick second pass on cleaning hardware or a closer inspection of a crawlspace can prevent small issues from popping up after the equipment is gone. It is also an ideal checkpoint to confirm that your goals for the space align with what the structure is ready to support, keeping the entire water damage restoration process on a steady cadence.
Resilience: Preparing for the Next Storm
Once you’re out of the urgent phase, it’s natural to ask what would make the next storm less stressful. Malibu homes benefit from simple, strategic improvements. Thoughtful grading to move water away from entries, gutter and downspout systems that feed into clean, free-flowing drainage, and door thresholds that balance clean lines with effective weather protection all help. For homes near the shore, inspecting sliders for track integrity and weep hole function is essential, as is maintaining sealants before they reach the end of their useful life. Where feasible, sump systems in lower levels should be sized and maintained for storm loads and backed by reliable power. Some properties can benefit from barriers or deployable solutions that respect sightlines while providing a margin of safety in extreme events.
Malibu Materials: What Stays, What Goes
Decisions about removal versus salvage are as much about time and exposure as they are about material type. Old-growth framing lumber in a hillside home can often dry and continue to serve for decades, while MDF baseboards or particleboard cabinetry exposed to floodwater tend to swell and lose integrity beyond recovery. Stone floors tolerate water well but hide moisture in the mortar bed; engineered wood might look reasonably flat from above while trapping vapor beneath the underlayment. The important thing is to answer these questions with data—meter readings, core samples where needed, and a record of the water’s category—so the choices you make are justified and durable.
Neighbors, Access, and Community-Wide Events
After a major storm, Malibu becomes a network of interdependent efforts. Roads may be partially closed, contractors are juggling multiple calls, and building supply deliveries can be delayed. Coordinating with neighbors about access windows, generator use, and parking makes the work smoother for everyone. Clear signage at your property helps crews navigate safely, especially in multi-level homes with multiple entries. Patience pairs with persistence here: moving steadily, documenting diligently, and communicating clearly keeps your project from getting lost in the shuffle.
What It Feels Like When It Goes Right
There’s a moment in every successful restoration when the house feels like itself again. The musty edge in the air is gone, surfaces are dry to the touch and verified by numbers, and the hum of equipment yields to familiar quiet. It’s not just about repairing what was harmed; it’s about restoring confidence in your space. When the work respects the home’s architecture, the climate’s quirks, and the owner’s priorities, that confidence returns faster.
Frequently Asked Questions
How quickly should I act after discovering storm-related flooding?
Act as soon as it is safe. Shut off affected power, take photographs, and initiate professional assessment and extraction within hours. The earlier you remove water and control humidity, the fewer materials are lost and the lower the chance of secondary issues such as swelling wood, corrosion, and mold growth.
Is stormwater considered contaminated?
Stormwater is typically considered contaminated because it often carries soil, organic matter, and sometimes wastewater from overwhelmed systems. That classification guides cleaning and disposal decisions and influences which materials can be salvaged.
Can hardwood floors be saved after winter storm flooding?
Sometimes. If extraction and drying begin promptly and the intrusion is limited, certain hardwood installations can be dried and flattened. However, boards over saturated subfloors or those that have cupped and crowned extensively may require selective removal to address trapped moisture before repair or replacement.
Why do I need dehumidifiers if the weather outside is windy?
Wind helps move air, but it doesn’t always reduce humidity to the levels needed for structural drying. Professional dehumidification captures and removes water vapor from the indoor air, allowing wet materials to release moisture consistently without re-absorbing it from a damp environment.
What about the smell after a flood—does it mean mold?
Odors can come from several sources, including organic debris in stormwater and materials off-gassing as they dry. While musty odors often accompany mold, the smell alone isn’t definitive. A combination of visual inspection, moisture readings, and, when needed, sampling under proper protocols provides clarity.
How do I protect metal fixtures and appliances from salt damage?
Rinse and neutralize residues promptly, even if surfaces appear clean. Pay attention to hidden areas such as the underside of appliances, cabinet hardware, and door tracks. Dry thoroughly and verify that indoor humidity is controlled during the drying phase to minimize corrosion.
Will my insurance cover the work?
Coverage depends on your policy particulars and the source of water. What you can control is documentation: photographs, moisture logs, and a clear scope of mitigation work. This transparency supports your claim and streamlines conversations with your adjuster.
How long does a typical drying project take?
Duration varies with material types, saturation levels, and access to concealed spaces. Many projects stabilize within several days, while complex homes with dense assemblies or extensive moisture in subfloors may require longer. The key is to set drying goals and verify progress with readings.
Final Steps and Moving Forward
If you’re staring at damp baseboards, a darkened ceiling, or a patch of sand where it shouldn’t be, you’re not alone—and you don’t have to navigate the aftermath solo. Start with safety, call in experienced help, and keep the momentum with measured decisions. When you’re ready to stabilize, dry, and bring your home back to form, reach out for expert water damage restoration support tailored to Malibu’s unique coastal conditions. The sooner you begin, the sooner your home returns to being the calm center it’s meant to be.